| 일 | 월 | 화 | 수 | 목 | 금 | 토 |
|---|---|---|---|---|---|---|
| 1 | 2 | 3 | 4 | 5 | 6 | |
| 7 | 8 | 9 | 10 | 11 | 12 | 13 |
| 14 | 15 | 16 | 17 | 18 | 19 | 20 |
| 21 | 22 | 23 | 24 | 25 | 26 | 27 |
| 28 | 29 | 30 | 31 |
- struct
- http
- SWIFTUI
- uikit
- apns
- Switch
- IOS
- SWIFT
- 고차함수
- self
- 화면전환
- CoreImage
- viewlifecycle
- escaping
- mvvm
- Git
- Refresh
- calendar
- NotificationCenter
- singleton
- class
- Observer
- array
- Animation
- error
- ScrollView
- list
- PushNotification
- segue
- 글또
- Today
- Total
seong_hye, the developer
UIKit) Calendar / Weekly Calendar 구현해보기 본문
캘린더를 사용하는 과정에서 다른 라이브러리를 사용하지 않고
주간 캘린더를 어떻게 구현하면 좋을지 고민하며 공부한 내용을 정리해 보려 합니다.
날짜에 따른 데이터를 받아오는 기능을 만드는 과정에서
FSCalendar 라이브러리를 사용했던 것을
캘린더를 공부해서 직접 만들어보자 하는 생각이 들게 되었습니다.
Calendar

날짜별 장식이 있는 일정관리를 표시하고, 단일 날짜 또는 여러 날짜를 사용자가 선택할 수 있도록 제공하는 기능으로
캘린더 뷰를 사용하여 사용자가 커스터마이징한 추가 정보(ex_ 스케줄)가 있는 특정 날짜를 표시할 수 있습니다.
또한 캘린더 뷰를 사용하여 하나의 특정 날짜, 여러 날짜 또는 날짜가 없는 날짜를 선택할 수 있습니다.
단일 선택 주간 달력 뷰를 구현하기 위해 collectionView를 사용하고 기능에 캘린더를 활용하려 합니다.
우선 달을 보여줄 라벨과 주간으로 변경해 줄 버튼, 요일을 나타낼 라벨을 추가해줍니다.
 let days = ["일", "월", "화", "수", "목", "금", "토"]

    var previouButton: UIButton = {
        let button = UIButton()
        button.tintColor = .binderBlue
        button.setImage(UIImage(systemName: "arrow.left"), for: .normal)
        return button
    }()

    var monthLabel: UILabel = {
        let label = UILabel()
        label.text = "2024년 2월"
        label.font = .boldSystemFont(ofSize: 18)
        return label
    }()

    var nextButton: UIButton = {
        let button = UIButton()
        button.tintColor = .binderBlue
        button.setImage(UIImage(systemName: "arrow.right"), for: .normal)
        return button
    }()

    lazy var titleStackView: UIStackView = {
        let stackView = UIStackView(arrangedSubviews: [previouButton, monthLabel, nextButton])
        stackView.spacing = 20
        stackView.distribution = .fillEqually
        stackView.alignment = .fill
        return stackView
    }()

    lazy var dayStackView: UIStackView = {
        let stackView = UIStackView()
        stackView.spacing = 10
        stackView.distribution = .fillEqually
        return stackView
    }()
private func addDay() {
for day in days {
let label: UILabel = {
let label = UILabel()
label.text = day
label.textAlignment = .center
label.font = .systemFont(ofSize: 15)
return label
}()
dayStackView.addArrangedSubview(label)
}
}
-- 결과 화면 --

CollectionView를 활용한 주간 캘린더 보여주기
collecionView를 사용해서 달력을 구성하고
해당 날짜를 calendar를 활용해서 기능을 구현하도록 하였습니다.
lazy var weeklyCollectionView: UICollectionView = {
    let layout = UICollectionViewFlowLayout()
    layout.minimumInteritemSpacing = 0.5
    layout.scrollDirection = .vertical
    layout.sectionInset = UIEdgeInsets(top: 0, left: 0, bottom: 0, right: 0)
    let collectionView = UICollectionView(frame: .zero, collectionViewLayout: layout)
    return collectionView
}()
collectionView를 활용한 이유는 옆으로 보여지는 뷰를 구현하기 위함이며
layout.minimumInteritemSpacing = 0.5
위의 기능을 활용해서 간격을 조절해 좀 더 자연스럽게 요일 라벨과 어울리도록 해줍니다.
 private func setCollectionView() {
    weeklyCalendarView.weeklyCollectionView.delegate = self
    weeklyCalendarView.weeklyCollectionView.dataSource = self
    weeklyCalendarView.weeklyCollectionView.register(CalendarCell.classForCoder(), forCellWithReuseIdentifier: Cell.calenderCell)
}
func collectionView(_ collectionView: UICollectionView, layout collectionViewLayout: UICollectionViewLayout, sizeForItemAt indexPath: IndexPath) -> CGSize {
let width = (weeklyCalendarView.weeklyCollectionView.frame.size.width / 8)
let height = (weeklyCalendarView.weeklyCollectionView.frame.size.height - 2)
return CGSize(width: width, height: height)
}collectionView cell을 연결해주고
해당 cell의 item의 크기를 띄워지는 정도까지 고려해 나눠줌으로써 글자가 나타날 수 있도록 합니다.
( 사실 이 부분 수정하는데 시간이 제일 많이 걸렸습니다...)
이제 제일 중요한 날짜를 받아오는 기능!
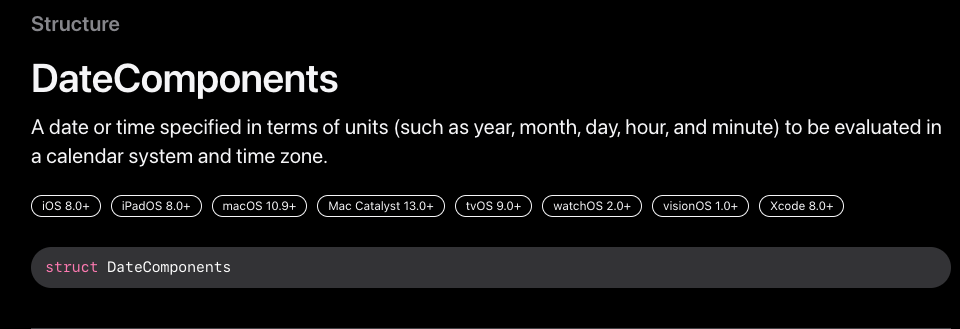
calendar의 DateComponents를 사용해보려고 합니다.

DateComponents는 확장 가능하고 구조화된 방식으로 날짜의 구성요소를 캡슐화합니다.
특정 달력에서 날짜와 시간을 구성하는
시간적 구성 요소(시, 분, 초, 일, 월, 년 등)를 제공하여 날짜를 지정하는 데 사용됩니다.
또한 시간의 지속 시간(예: 5시간 및 16분)을 지정하는 데 사용할 수 있습니다.
모든 구성 요소 필드를 정의하는 데 DateComponent가 필요한 것은 아닙니다.
새 DateComponent 인스턴스가 생성되면 DateComponent는 0으로 설정됩니다.
calender의 current를 통해 사용자 현재 달력을 받아와
일요일을 시작으로 한 주를 보여주는 함수를 구현합니다.
let calendar = Calendar.current

func dayOfMonth(date: Date) -> Int {
    let components = calendar.dateComponents([.day], from: date)
    return components.day!
}

func addDays(date: Date, days: Int) -> Date {
    return calendar.date(byAdding: .day, value: days, to: date)!
}

func sundayForDate(date: Date) -> Date {
    var current = date
    let oneWeekAgo = addDays(date: current, days: -7)

    while current > oneWeekAgo {
        let currentWeekDay = calendar.dateComponents([.weekday], from: current).weekday
        if currentWeekDay == 1 {
            return current
        }
        current = addDays(date: current, days: -1)
    }
    return current
}
위의 정보를 담은 CalendarManager를 통해 메서드를 받아와
일주일에서 토요일까지 날짜를 받아올 수 있도록 하였으며
동시에 누른 날의 달도 받아와 바꿀 수 있도록 하였습니다.
private func setSchedule() {
    var current = CalendarManager().sundayForDate(date: selectedDate)
    let nextSunday = CalendarManager().addDays(date: current, days: 7)

    while current < nextSunday {
        totalSquares.append(current)
        current = CalendarManager().addDays(date: current, days: 1)
    }

    weeklyCalendarView.monthLabel.text = CalendarManager().yearString(date: selectedDate)
    + " " + CalendarManager().monthString(date: selectedDate)
    weeklyCalendarView.weeklyCollectionView.reloadData()
}
위의 날짜를 배열로 받아와 collectionView의 개수를 나타내었으며
선택한 날짜에 따라 선택한 날짜가 잘 보일 수 있도록 글자의 크기가 바뀔 수 있도록 하였습니다.
var totalSquares = [Date]()

func collectionView(_ collectionView: UICollectionView, numberOfItemsInSection section: Int) -> Int {
    totalSquares.count
}

func collectionView(_ collectionView: UICollectionView, cellForItemAt indexPath: IndexPath) -> UICollectionViewCell {
    let cell = collectionView.dequeueReusableCell(withReuseIdentifier: Cell.calenderCell, for: indexPath) as! CalendarCell

    let date = totalSquares[indexPath.row]
    cell.dayOfWeek.text = String(CalendarManager().dayOfMonth(date: date))

    if date == selectedDate {
        cell.dayOfWeek.textColor = UIColor.binderBlue
        cell.dayOfWeek.font = .boldSystemFont(ofSize: 17)
        weeklyCalendarView.monthLabel.text = CalendarManager().yearString(date: selectedDate)
        + " " + CalendarManager().monthString(date: selectedDate)

    } else {
        cell.dayOfWeek.textColor = UIColor.binderGray
        cell.dayOfWeek.font = .systemFont(ofSize: 15)
    }
    return cell
}

func collectionView(_ collectionView: UICollectionView, didSelectItemAt indexPath: IndexPath) {
    selectedDate = totalSquares[indexPath.row]
    collectionView.reloadData()
}
또한 이전과 이후의 버튼에 target을 연동하여 선택한 날짜에 7일 차이를 활용하여
일주일 변동이 일어나도록 하였습니다.
@objc func previousWeek(_ sender: Any) {
    selectedDate = CalendarManager().addDays(date: selectedDate, days: -7)
    setWeekView()
}

@objc func nextWeek(_ sender: Any) {
    selectedDate = CalendarManager().addDays(date: selectedDate, days: 7)
    setWeekView()
}
-- 결과 화면 --

-- 추가한 기능 --
주간 캘린더에 받은 일정과 연동하여
일정이 있는 경우 날짜 아래에 image가 뜰 수 있도록 하였습니다.
이제 연동한 것을 바탕으로 달력 아래에 기능을 더 추가해볼까합니다.

'IOS > UIKit' 카테고리의 다른 글
| UIKit) MVP Architecture에 대해 알아보기 (0) | 2025.09.01 |
|---|---|
| Swift) 책과 같이 페이지 넘기는 애니메이션에 대해 알아보기 (UIPageViewController) (0) | 2025.06.25 |
| iOS) Calendar에 대해 알아보기 (0) | 2023.09.19 |
| Swift) UISearchController에 대해 알아보기 (0) | 2022.11.08 |
| Swift) UIActivityViewController에 대해 알아보기 (ShareSheet) (0) | 2022.11.06 |


